8 Panzer IV H
3 Panzer III N
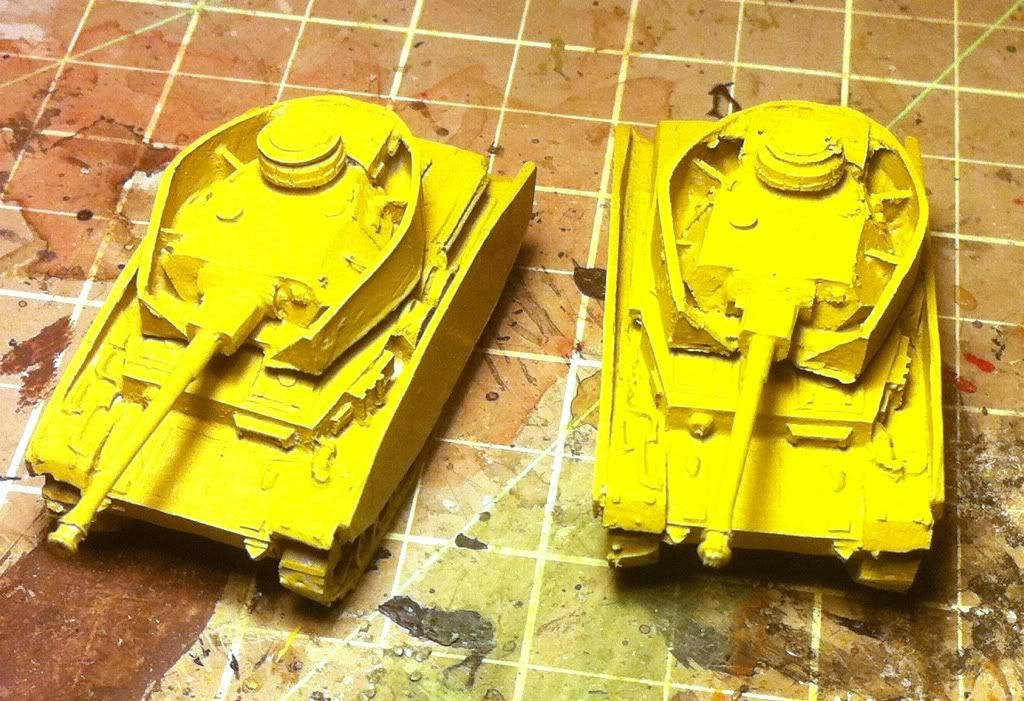
STEP ONE:
After priming with your preferred primer (I prefer a cheap grey automobile primer), I use Vallejo Desert Yellow as my basecoat. Be sure to coat the entire tank, including the drive wheels.
STEP TWO:
The next step is to apply the camouflage colors. Using a mix of 1 part water to 1 part Vallejo Bestial Brown, use the natural surface tension of the water to form paint lines. Try to make them fairly random, and don't use the same brush strokes all the time.
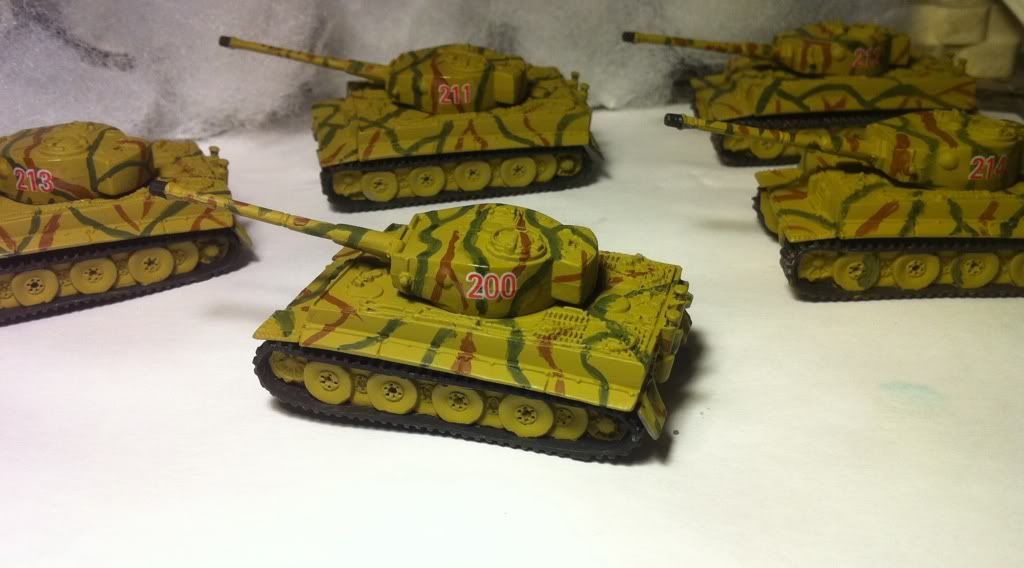
STEP THREE:
The third step is very similar to the 2nd step. Using the same 1:1 ratio, this time using Vallejo Cayman Green, paint additional camo lines in the gaps left by the last step. You are not trying to cover all the yellow, but rather just break it up.

STEP FOUR:
This step is where you pick out all the details. Paint tracks black, as with any unfinished metal surfaces. Paint tool handles brown. Then move on to the final required step (and extra credit after that)!
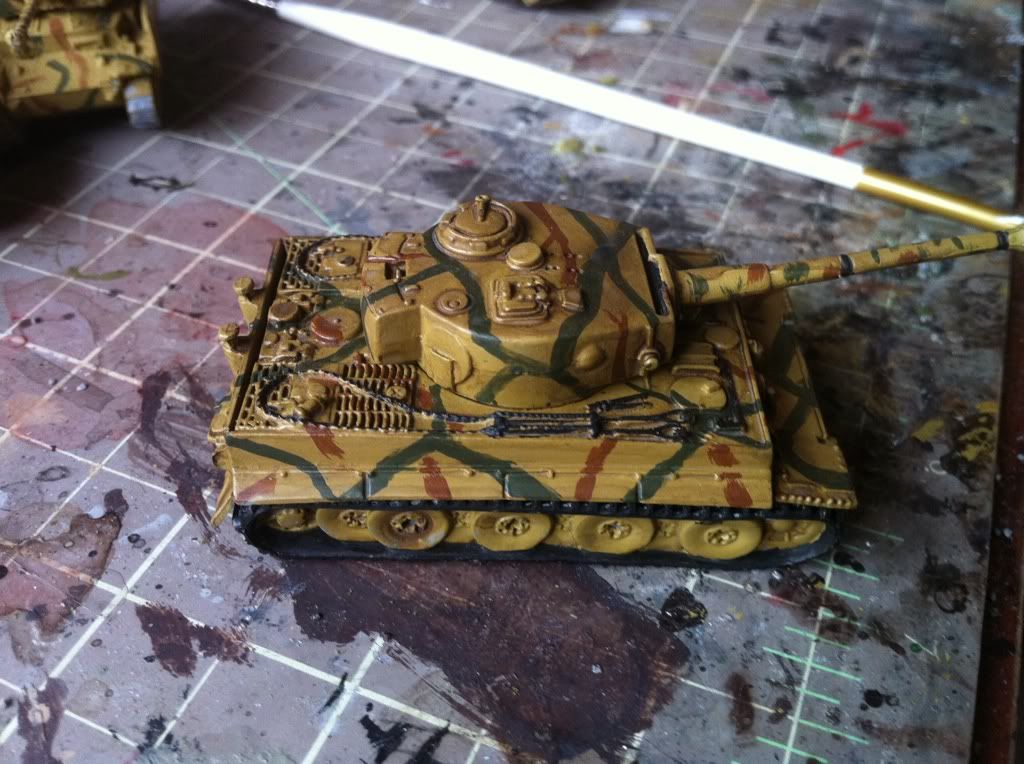
STEP FIVE:
I ran out of Devlan Mud wash from citadel, so I got out a Tiger to use as an example. Using Devlan Mud, wash down the entire tank. This dulls down the yellow and makes it more closely resemble the dark yellow used by Axis Panzers. Get it especially heavy in the drive wheels, to add shading and definition. After this wash is completely dry, take a soft-leaded graphite pencil and rub the lead on the metal edges to make them appear worn, such as track edges and tool edges.
And there you have it: my formula for painting Panzers up fast. I finished all but the wash in under three hours for my entire Panzerkompanie of 11 Panzers.
EXTRA CREDIT:
When dry, get out your decals! There are other, more detailed, guides out there that can walk you through that process. Also, you can further add definition by blacklining or highlighting, also covered elsewhere in more detail. Go wild!
EDIT 2/12/2013: This is still one of my biggest hits on this site, but I had let the pictures go down, much to my shame. I finally decided to fix the links so that others may benefit from this technique, which they clearly still want to know about!
No comments:
Post a Comment